
When we create and display a 3D scene, there are many things to think about besides just the position in 3D space. Objects can have different shapes, like planes or curves, and sometimes we need to show what’s inside them. Graphics software often has features to display the insides or cutaway views of objects.
Transforming objects in 3D is more complex than in 2D. For example, we can rotate an object around any axis in 3D space, while in 2D, rotations are always around an axis perpendicular to the flat surface.
Viewing a 3D scene is more involved because we have more choices to make. We need to decide how the 3D scene is shown on a 2D screen. This involves converting the 3D coordinates to 2D coordinates. We also need to figure out which parts of the scene are visible from a chosen viewpoint. If we want the scene to look realistic, we may need to use special techniques to make surfaces appear more detailed.
In summary, modeling and displaying 3D scenes requires considering various factors such as object shapes, internal details, transformations, and viewing techniques to create an accurate and visually appealing representation.
THRFF-DIMENSIONAL DISPLAY METHODS
Three-dimensional (3D) display methods are techniques used to present and visualize 3D objects or scenes in a way that provides depth perception and a sense of realism. Here are some common 3D display methods:
- Stereo Display: Stereo display creates a 3D effect by presenting a slightly different image to each eye. This can be achieved using techniques like stereoscopic glasses, where each eye sees a different image through specially designed lenses. Another method is autostereoscopy, which uses lenticular lenses or parallax barriers to allow each eye to see a different set of pixels on a display without the need for glasses.
- Virtual Reality (VR): Virtual reality is an immersive 3D display method that creates a simulated environment. Users typically wear a head-mounted display (HMD) that provides a wide field of view and tracks head movements. This allows users to explore and interact with virtual worlds in a more realistic and immersive manner.
- Augmented Reality (AR): Augmented reality overlays virtual objects or information onto the real world. AR can be experienced through various devices, such as smartphones, tablets, or smart glasses. The virtual objects appear to coexist with the real environment, enhancing the user’s perception and understanding of the real world.
- Holographic Display: Holographic display technology projects or displays 3D images that appear to float in space. It uses diffraction, interference, and light field principles to recreate a realistic 3D representation of an object. Holographic displays are still in development but show promise for future applications.
- 3D Projection Mapping: Projection mapping is a technique that projects 3D images or animations onto irregularly shaped objects or surfaces, such as buildings or sculptures. By carefully aligning the projected content with the physical object, the object appears to transform or come to life, creating an immersive and visually captivating experience.
- Autostereograms: Autostereograms, also known as Magic Eye images, are 2D patterns that create a 3D perception without the need for special glasses or devices. By focusing the eyes in a specific way, hidden 3D images within the pattern become visible, creating an illusion of depth.
Parallel Projection
Parallel projection is a widely used technique in computer graphics to represent three-dimensional objects or scenes on a two-dimensional surface without creating a sense of perspective or depth. In parallel projection, lines that are parallel in 3D space remain parallel in the projected 2D image.
There are two common types of parallel projection:
- Orthographic Projection: In orthographic projection, parallel lines in the 3D scene remain parallel in the projected image, and all lines perpendicular to the viewing plane are projected as parallel lines. This results in a uniform scaling of the objects, where their size remains the same regardless of their distance from the viewer. Orthographic projection is often used in technical drawings, architectural plans, and engineering illustrations.
- Oblique Projection: Oblique projection is a parallel projection technique that introduces an angle or skew to the projected image. Unlike orthographic projection, oblique projection allows for the introduction of perspective-like effects by tilting the object relative to the viewing plane. Common examples of oblique projections include cavalier projection and cabinet projection, where the object is projected at an angle to create a more realistic representation while maintaining the parallelism of lines.
Parallel projection is particularly useful when precise measurements or accurate scaling is required. It simplifies the representation of objects, making it easier to work with their proportions and dimensions. Additionally, parallel projection can be advantageous in situations where perspective distortion is not desirable or when maintaining uniformity in object sizes is important.
By employing parallel projection techniques, computer graphics software can generate 2D representations of 3D scenes or objects that are suitable for technical illustrations, design drafts, and various other applications where conveying accurate shape and proportion is crucial.
Perspective Projection
Perspective projection is a commonly used technique in computer graphics that aims to create a realistic representation of three-dimensional objects or scenes by simulating the way they appear in the human visual perception. Unlike parallel projection, perspective projection takes into account the effects of distance and foreshortening, resulting in a sense of depth and spatial relationships.
In perspective projection, objects that are farther away from the viewer appear smaller, and parallel lines converge towards a vanishing point on the horizon. This convergence mimics the way objects appear in the real world when viewed from a specific viewpoint.
The perspective projection process involves the following steps:
- Viewing Frustum: A viewing frustum, which resembles a pyramid with the top cut off, is defined to represent the volume of space visible to the viewer. It includes a near plane, far plane, and the viewer’s position or camera.
- Projection Transformation: The 3D coordinates of the objects in the scene are transformed into homogeneous coordinates and multiplied by a projection matrix. This matrix applies the necessary transformations to create the perspective effect, such as scaling objects based on their distance from the camera.
- Clipping: Objects or parts of objects that fall outside the viewing frustum are clipped or removed from the scene to ensure only visible elements are rendered.
- Viewport Transformation: The projected coordinates are then mapped onto a 2D viewport or display surface, such as a computer screen or a virtual canvas.
The resulting image from perspective projection provides a more realistic representation of the scene, as objects appear to have depth and follow the rules of perspective. This technique is widely used in computer graphics applications, including video games, virtual reality, architectural visualization, and film special effects, to create immersive and visually compelling experiences.
By simulating the way human vision perceives the world, perspective projection enhances the sense of realism, depth, and spatial relationships in rendered scenes, making them more relatable and engaging to viewers.
Depth Cueing
Depth cueing, also known as depth perception or depth rendering, is a technique used in computer graphics to provide visual cues that help viewers perceive the depth and spatial relationships of objects in a scene. It enhances the realism and understanding of a 3D environment by simulating how objects appear differently based on their distance from the viewer.
There are various depth cueing techniques employed in computer graphics:
- Depth-based Color or Intensity: Objects that are farther away from the viewer can be rendered with lighter colors or reduced intensity, creating a sense of atmospheric perspective. This mimics how objects in the distance appear less vibrant or less distinct due to atmospheric effects such as haze or fog.
- Depth-based Blur: Adding a blur effect to objects that are farther away can simulate the natural blurring that occurs as objects recede into the distance. This technique, known as depth of field, directs the viewer’s focus to the objects in the foreground while slightly blurring objects in the background.
- Depth-based Shadows: Shadows play a crucial role in conveying depth in a scene. By rendering shadows that correspond to the position and orientation of objects relative to light sources, depth perception is enhanced. Shadows become longer and softer as objects move away from the light source.
- Depth-based Size Scaling: Objects can be rendered smaller as they move farther away from the viewer, maintaining their relative proportions. This technique, known as size scaling or perspective scaling, helps create a sense of depth and distance in the scene.
- Depth-based Overlapping: Overlapping objects, where one object partially obscures another, provide important visual cues about their relative positions in 3D space. Rendering objects with proper occlusion based on their depth enhances the perception of depth and spatial relationships.
By incorporating these depth cueing techniques, computer graphics can create more realistic and visually engaging scenes. Depth cueing helps viewers understand the layout of a 3D environment, estimate distances between objects, and immerse themselves in virtual worlds or simulations. It is widely used in applications such as video games, virtual reality, architectural visualization, and scientific simulations to enhance the visual experience and improve the perception of depth and space.
Visible Line and Surface Identification
Visible line and surface identification is an essential process in computer graphics that determines which lines and surfaces of 3D objects are visible or hidden from a given viewpoint. This step is crucial for rendering realistic and accurate representations of objects and scenes.
To identify visible lines and surfaces, several techniques and algorithms are commonly used:
- Backface Culling: Backface culling is a technique that determines whether the surface of a polygon is facing away from or towards the viewer. By calculating the dot product of the surface normal with the view vector, it is possible to determine if the polygon is visible or should be discarded.
- Hidden Surface Removal: Hidden surface removal techniques are employed to identify and remove surfaces that are not visible in a scene, improving rendering efficiency. Popular algorithms for hidden surface removal include the Z-buffer algorithm, which uses a depth buffer to store the depth information of each pixel, and the Painter’s algorithm, which sorts surfaces based on their depth and renders them from back to front.
- Clipping: Clipping involves removing parts of objects that are outside the viewing frustum or viewport, ensuring that only visible portions are rendered. This process helps optimize rendering by discarding geometry that is not visible.
- Depth Sorting: In scenes with overlapping objects, depth sorting determines the order in which objects or surfaces are rendered. Objects that are closer to the viewer are typically rendered first, followed by objects that are farther away. This ensures proper occlusion and avoids rendering objects in incorrect order.
- Culling Algorithms: Culling algorithms identify and discard objects or portions of objects that are not visible based on predefined criteria. For example, frustum culling removes objects that are completely outside the viewing frustum, while view frustum culling discards objects that are partially or fully outside the field of view.
By applying these techniques, computer graphics systems can accurately determine which lines and surfaces should be rendered, reducing unnecessary computations and improving the overall visual quality of the scene. Visible line and surface identification is a critical step in the rendering pipeline, allowing for efficient and realistic representations of 3D objects and scenes in various applications such as gaming, animation, virtual reality, and architectural visualization.
THREE-DIMENSIONAL GRAPHICS PACKAGES
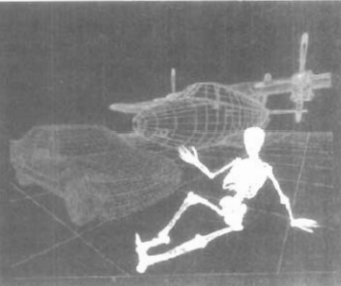
Three-dimensional (3D) graphics packages are software tools or libraries that provide a range of features and functionalities for creating, editing, and rendering 3D graphics and animations. These packages are designed to assist artists, designers, and developers in working with 3D objects, scenes, and visual effects. Here are some key aspects and capabilities of 3D graphics packages:
- Modeling Tools: 3D graphics packages offer a variety of modeling tools for creating and manipulating 3D geometry. These tools enable users to create complex shapes, modify vertices, edges, and faces, and apply textures and materials to objects. Common modeling techniques include polygonal modeling, NURBS (Non-Uniform Rational B-Splines) modeling, and sculpting.
- Lighting and Shading: 3D graphics packages provide options for defining and controlling lighting conditions within a scene. Users can position light sources, adjust their properties (such as intensity, color, and direction), and apply various lighting models, such as ambient, directional, point, and spotlights. Additionally, shading tools allow users to apply different surface materials, textures, and visual effects to objects, enhancing their appearance and realism.
- Animation Tools: Animation features in 3D graphics packages enable the creation of dynamic and interactive 3D scenes. Users can set keyframes, define motion paths, and animate object transformations, such as translation, rotation, and scaling. Advanced packages may also support skeletal animation, inverse kinematics, and physics simulations for realistic object behaviors.
- Rendering and Visualization: 3D graphics packages include rendering engines that generate high-quality images or animations based on the scene’s geometry, lighting, materials, and other parameters. They support various rendering techniques, such as ray tracing, global illumination, and rasterization. Users can control rendering settings, manage render passes, and generate outputs in different formats and resolutions.
- Import and Export Formats: 3D graphics packages typically support a wide range of file formats for importing and exporting 3D assets. This allows users to work with models, textures, animations, and other elements created in different software or obtained from external sources. Common file formats include OBJ, FBX, COLLADA, and STL.
- Integration and Scripting: Many 3D graphics packages provide integration with scripting languages, allowing users to automate tasks, create custom tools, or extend the functionality of the software. Scripting capabilities provide flexibility and enhance productivity by enabling users to write scripts to perform repetitive actions or implement complex workflows.
Popular 3D graphics packages in the industry include Blender, Autodesk Maya, 3ds Max, Cinema 4D, and Unity, among others. Each package offers its unique set of features, workflows, and target audiences, catering to various industries such as film, animation, game development, architectural visualization, product design, and virtual reality experiences.