
Data tables are fundamental components in web applications, enabling the display and manipulation of tabular data. In this comprehensive guide, we’ll explore the process of designing an advanced and flexible Vue.js 2.x component for displaying data tables. This custom component will provide a rich set of features, including sorting, pagination, and customization options, making it suitable for various data presentation needs.
Setting Up the Vue Project:
To start building our advanced data table component, create a new Vue project using the Vue CLI. If you haven’t installed it, run:
npm install -g @vue/cli
vue create vue-data-table
cd vue-data-table
Installing Dependencies:
Install the required dependencies, including vue, axios for making HTTP requests (optional), and lodash for utility functions:
npm install vue axios lodash
Designing the DataTable Component:
- Create a
DataTable.vuecomponent:
<template>
  <div class="data-table">
    <table>
      <thead>
        <tr>
          <!-- Header columns will be dynamically generated -->
          <th v-for="column in columns" :key="column.field" @click="sort(column.field)">
            {{ column.label }}
            <span v-if="column.field === sortedColumn.field" :class="{'asc': sortedColumn.order === 'asc', 'desc': sortedColumn.order === 'desc'}"></span>
          </th>
        </tr>
      </thead>
      <tbody>
        <tr v-for="item in paginatedData" :key="item.id">
          <td v-for="column in columns" :key="column.field">{{ item[column.field] }}</td>
        </tr>
      </tbody>
    </table>

    <!-- Pagination controls -->
    <div class="pagination">
      <button @click="changePage('prev')" :disabled="currentPage === 1">Previous</button>
      <span>{{ currentPage }}</span>
      <button @click="changePage('next')" :disabled="currentPage === totalPages">Next</button>
    </div>
  </div>
</template>

<script>
import axios from 'axios';
import _ from 'lodash';

export default {
  props: {
    apiUrl: String, // API endpoint for data retrieval
    columns: Array, // Array of column configurations (label, field)
    itemsPerPage: {
      type: Number,
      default: 10,
    },
  },
  data() {
    return {
      data: [], // Retrieved data from the API
      sortedColumn: { field: '', order: 'asc' },
      currentPage: 1,
    };
  },
  computed: {
    paginatedData() {
      // Paginate the data based on currentPage and itemsPerPage
      const startIndex = (this.currentPage - 1) * this.itemsPerPage;
      const endIndex = startIndex + this.itemsPerPage;
      return this.sortedData.slice(startIndex, endIndex);
    },
    totalPages() {
      return Math.ceil(this.sortedData.length / this.itemsPerPage);
    },
    sortedData() {
      // Sort the data based on sortedColumn
      const order = this.sortedColumn.order === 'asc' ? 1 : -1;
      return _.orderBy(this.data, [this.sortedColumn.field], [order]);
    },
  },
  methods: {
    fetchData() {
      // Fetch data from the provided API endpoint
      axios.get(this.apiUrl)
        .then(response => {
          this.data = response.data;
        })
        .catch(error => {
          console.error('Error fetching data:', error);
        });
    },
    sort(field) {
      // Handle sorting when a column header is clicked
      if (this.sortedColumn.field === field) {
        this.sortedColumn.order = this.sortedColumn.order === 'asc' ? 'desc' : 'asc';
      } else {
        this.sortedColumn.field = field;
        this.sortedColumn.order = 'asc';
      }
    },
    changePage(direction) {
      // Change the current page based on user interaction
      if (direction === 'prev' && this.currentPage > 1) {
        this.currentPage--;
      } else if (direction === 'next' && this.currentPage < this.totalPages) {
        this.currentPage++;
      }
    },
  },
  mounted() {
    // Fetch data when the component is mounted
    this.fetchData();
  },
};
</script>

<style scoped>
.data-table {
  margin: 20px;
}

table {
  width: 100%;
  border-collapse: collapse;
}

th, td {
  border: 1px solid #ddd;
  padding: 8px;
  text-align: left;
}

th {
  cursor: pointer;
}

th span {
  display: inline-block;
  margin-left: 5px;
  border: 4px solid transparent;
  border-top-color: currentColor;
  opacity: 0.6;
}

th.asc span {
  border-top-color: transparent;
  border-bottom-color: currentColor;
}

th.desc span {
  border-top-color: transparent;
  border-bottom-color: currentColor;
  transform: rotate(180deg);
}
</style>
Using the DataTable Component in App.vue:
- Update the
App.vuecomponent:
<template>
  <div id="app">
    <DataTable
      apiUrl="https://jsonplaceholder.typicode.com/posts" <!-- Example API endpoint -->
      :columns="tableColumns"
      :itemsPerPage="10"
    />
  </div>
</template>

<script>
import DataTable from './components/DataTable.vue';

export default {
  components: {
    DataTable,
  },
  data() {
    return {
      tableColumns: [
        { label: 'ID', field: 'id' },
        { label: 'Title', field: 'title' },
        { label: 'Body', field: 'body' },
      ],
    };
  },
};
</script>

<style>
#app {
  display: flex;
  justify-content: center;
  align-items: center;
  height: 100vh;
  background-color: #ecf0f1;
  margin: 0;
}
</style>
Explanation of the DataTable Component:
- The
DataTable.vuecomponent is designed to be highly customizable, supporting dynamic columns and paginated data. - The
axioslibrary is used for making HTTP requests to fetch data from an API endpoint. - The component includes sorting functionality based on the clicked column header and supports pagination with “Previous” and “Next” buttons.
Running the Application:
Run the following commands to see the advanced data table component in action:
npm install
npm run serve
Visit http://localhost:8080 in your browser to interact with the Vue.js 2.x data table component.
Here is the following steps to implement an advanced and flexible Vue.js 2.x component for displaying data tables
Feature rich and capable of handling big data, JD-Table was designed to integrate into applications with various needs
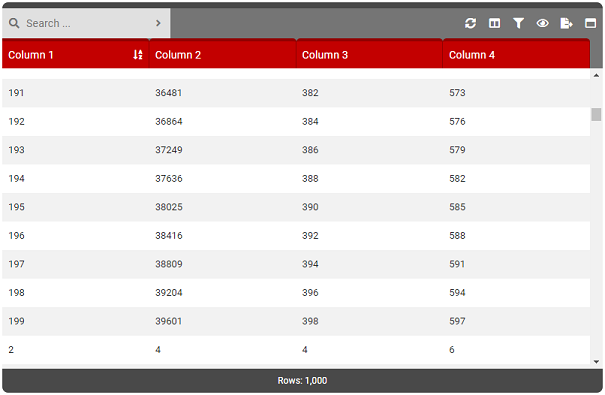
Features
- Supports internal/external (API) data
- Traditional pagination
- Virtual scroll pagination
- Responsive/Fixed table sizing
- Responsive/Fixed column sizing
- Full-text search
- Column filtering
- Column selection
- Column views
- Column sorting
- Column resizing
- Left/Right click context menus
- Excel exportation
- Full screen/minimize
- Row ‘Quick View’
- … and more!
Install
NPM
npm install --save-dev vue-jd-table
npm install --save-dev @fortawesome/fontawesome-free
Font Awesome (Free) is required for JD-Table. Failing to install this will result in missing icons.
Manual
- Clone this repository or download and save these files to your project
- ./dist/jd-table.min.js
- ./dist/jd-table.min.css
Initialize
nitializing includes 4 parts: Template, Vue Component, Options/Props and Theme. Below are a number of different ways to initialize JD-Tables depending on your needs.
<template>
    <div id="app">
        <!-- JD-TABLE REQUIRED - TEMPLATE -->
        <JDTable
            :option                 = "tableOptions"
            :loader                 = "tableLoader"
            :event-from-app         = "eventFromApp"
            :event-from-app-trigger = "eventFromAppTrigger"
            @event-from-jd-table    = "processEventFromApp( $event )"
        />

        <!-- JD-TABLE REQUIRED - EXCEL EXPORT -->
        <iframe id="excelExportArea" style="display:none"></iframe>
    </div>
</template>

<script>
    // JD-TABLE REQUIRED - COMPONENT REGISTRATION
    import "@fortawesome/fontawesome-free/css/all.min.css";
    import JDTable from 'vue-jd-table';

    export default
    {
        name : 'MyApp',

        // JD-TABLE REQUIRED - COMPONENT REGISTRATION
        components:
        {
            JDTable
        },

        // JD-TABLE REQUIRED - OPTIONS/PROPS
        data ()
        {
            return {
                tableOptions        : { // ADD OPTIONS HERE },
                eventFromApp        : { name : null, data : null },
                eventFromAppTrigger : false,
                tableLoader         : false,
                columns             : [ // ADD COLUMNS HERE ]
            }
        }
    }
</script>

<style lang="scss">
    // JD-TABLE OPTIONAL - VARIABLE OVERRIDE

    // JD-TABLE REQUIRED - THEME
    @import "~vue-jd-table/dist/assets/jd-table.scss";
</style>
Script
The following shows an example of how to use JD-Table in your HTML files directly. You will require a polyfill for JD-Table.
<!-- Polyfill -->
<script src="https://polyfill.io/v3/polyfill.js?features=es5,es6,es7&flags=gated"></script>

<!-- VueJS -->
<script src="https://cdn.jsdelivr.net/npm/vue/dist/vue.js"></script>

<!-- JD-Table Vue Component -->
<script src="vue-jd-table/dist/jd-table.min.js"></script>

<!-- JD-Table Styles -->
<link rel="stylesheet" href="vue-jd-table/dist/jd-table.min.css">

<!-- Font Awesome (Free) -->
<link rel="stylesheet" href="https://use.fontawesome.com/releases/v5.7.2/css/all.css" integrity="sha384-fnmOCqbTlWIlj8LyTjo7mOUStjsKC4pOpQbqyi7RrhN7udi9RwhKkMHpvLbHG9Sr" crossorigin="anonymous">

<div id="app">
    <JDTable
        :option                 = "tableOptions"
        :loader                 = "tableLoader"
        :event-from-app         = "eventFromApp"
        :event-from-app-trigger = "eventFromAppTrigger"
        @event-from-jd-table    = "processEventFromApp( $event )"
    />

    <iframe id="excelExportArea" style="display:none"></iframe>
</div>

<script type="text/javascript">
    new Vue
    ({
        el : '#app',

        components:
        {
            JDTable
        },

        data ()
        {
            return {
                tableOptions        : { // ADD OPTIONS HERE },
                eventFromApp        : { name : null, data : null },
                eventFromAppTrigger : false,
                tableLoader         : false,
                columns             : [ // ADD COLUMNS HERE ]
            }
        },

        ...
    });
</script>