
Output primitives refer to basic graphical entities used to create images on a computer screen or other output devices. These primitives are fundamental building blocks that can be combined to create more complex shapes and images. Here are some common attributes of output primitives:
- Shape: Output primitives can have various shapes, such as points, lines, curves, polygons, circles, or ellipses. The shape attribute determines the overall appearance of the primitive.
- Size: Primitives can have different sizes, which determine their dimensions in terms of length, width, or radius. Size is usually specified in pixels or other units depending on the output device.
- Position: The position attribute defines the location of the primitive in the output space. It is typically specified by providing the coordinates of a reference point, such as the top-left corner or the center of the primitive.
- Color: Primitives can be filled with solid colors or gradients, or they can be outlined with different colors. Color attributes allow for the specification of the hue, saturation, and brightness or transparency of the primitive.
- Line style: For line-based primitives, such as lines or curves, the line style attribute determines the appearance of the stroke. It can include attributes like thickness, pattern (e.g., dashed or dotted), and end-cap style (e.g., round or square).
- Transparency: Output primitives can have varying levels of transparency or opacity. This attribute determines how much the underlying content or background is visible through the primitive.
- Texture or pattern: Instead of solid colors, primitives can be filled with various textures or patterns, such as checkerboards, stripes, or images. Texture or pattern attributes allow for the customization of the fill appearance.
- Orientation: Some output primitives, like polygons or ellipses, may have an orientation attribute that determines their rotation or angle in the output space. This attribute is often specified in degrees.
- Depth or layering: When dealing with three-dimensional graphics, output primitives may have a depth or layering attribute. This attribute determines the order in which primitives are drawn on top of each other, creating the illusion of depth.
These attributes can be adjusted and combined in different ways to create a wide range of visual elements and images using output primitives.
LINE ATTRIBUTES
Line attributes are properties that define the appearance of lines in computer graphics or drawings. These attributes allow for customization and control over the style, thickness, and other characteristics of lines. Here are some common line attributes:
- Thickness or width: This attribute determines the thickness or width of a line. It specifies the extent of the line perpendicular to its direction. Line thickness is usually measured in pixels or other units and can range from very thin to thick.
- Style: Line style defines the pattern of dashes and gaps along the length of a line. Common line styles include solid, dashed, dotted, or a combination of these patterns. Different line styles can be used to convey different meanings or create visual effects.
- Color: The color attribute determines the hue of the line. It allows for the specification of a wide range of colors using color models such as RGB (Red, Green, Blue), CMYK (Cyan, Magenta, Yellow, Black), or HSL (Hue, Saturation, Lightness). The color can be solid or gradient-based, allowing for smooth transitions between colors along the line.
- Transparency: Line transparency refers to the degree to which the line allows the underlying content or background to show through. This attribute allows for creating semi-transparent or translucent lines, which can be useful for highlighting or blending with the surrounding elements.
- Start and end caps: Line caps define the appearance of the ends of a line. The options for line caps include flat, square, or rounded ends. This attribute determines how the line terminates at its starting and ending points.
- Join Style: For lines that connect multiple line segments, the join style attribute defines the appearance at the junctions. Common join styles include miter, round, and bevel. The join style affects the shape and smoothness of the connection between two line segments.
- Anti-aliasing: Anti-aliasing is a technique used to smooth the jagged or pixelated appearance of lines, especially at lower resolutions. This attribute determines whether anti-aliasing is applied to lines, resulting in smoother and more visually pleasing edges.
These line attributes can be adjusted and combined to create a wide variety of line styles and effects in computer graphics and drawings. By manipulating these attributes, designers and artists can achieve different visual outcomes and enhance the overall appearance of their artwork.
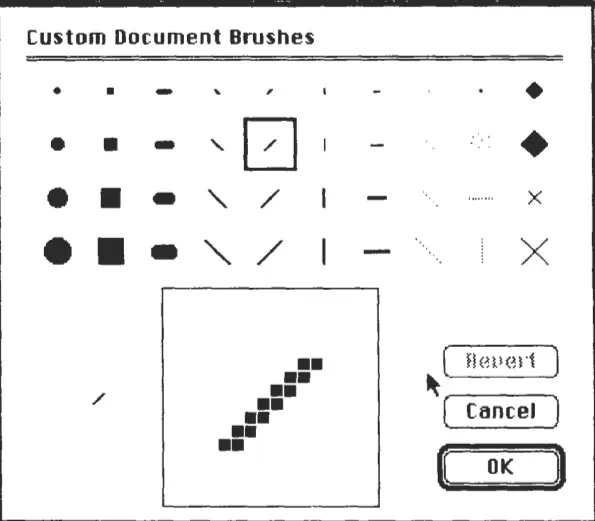
Pen and Brush Options
Pen and brush options are commonly used in computer graphics software to control the drawing tools and their characteristics. These options allow users to define the style, thickness, color, and other attributes of lines and shapes. Here are some common pen and brush options:
Pen Options:
- Pen Thickness: This option determines the width or thickness of the pen stroke. It controls the size of lines drawn by the pen tool, allowing users to create thin or thick strokes as desired.
- Pen Color: The pen color option sets the hue of the pen stroke. It allows users to choose from a wide range of colors using color models such as RGB, CMYK, or HSL.
- Pen Style: Pen style refers to the pattern or texture applied to the pen stroke. It can include options such as solid lines, dashed lines, dotted lines, or custom patterns.
- Pen Transparency: This option controls the opacity or transparency of the pen stroke. It determines how much of the underlying content or background is visible through the stroke.
- Smoothing: Smoothing is an option that helps to create smooth and curved lines by reducing jagged edges. It applies algorithms to the pen strokes to make them appear more polished and refined.
Brush Options:
- Brush Shape: The brush shape option defines the overall shape of the brush tip. It can include options like round, square, or custom shapes. The brush shape affects the appearance of brush strokes and how they interact with the canvas.
- Brush Size: This option determines the size or diameter of the brush tip. It controls the width of the brush strokes, allowing users to create thin lines or broader strokes.
- Brush Hardness: Brush hardness determines the edge sharpness or softness of the brush strokes. A hard brush has a crisp edge, while a soft brush has a more gradual transition from the stroke to the background.
- Brush Opacity: Brush opacity controls the transparency or opacity of the brush strokes. It determines how much of the underlying content or background is covered by the brush strokes.
- Brush Flow: Brush flow refers to the rate at which ink or color is applied by the brush tool. It determines the intensity or saturation of the brush strokes. Higher flow values result in more ink or color being deposited, while lower values create lighter strokes.
These pen and brush options provide users with flexibility and control over the appearance and behavior of drawing tools in computer graphics software. By adjusting these options, artists, and designers can achieve a wide variety of effects and styles in their digital artwork.
CURVE ATTRIBUTES
Curve attributes refer to the properties and characteristics that define the shape, appearance, and behavior of curves in computer graphics or mathematical representations. Curves are often used to create smooth and continuous lines or shapes. Here are some common curve attributes:
- Control Points: Control points are specific points that influence the shape and direction of a curve. They act as handles or anchors that allow users to manipulate and control the curve. By adjusting the positions of control points, the curve can be reshaped and modified.
- Degree: The degree of a curve determines the complexity and flexibility of its shape. It represents the number of control points required to define a curve. Higher-degree curves can have more intricate shapes and allow for more precise control.
- Interpolation: Interpolation refers to the process of determining the curve based on a set of known points or data. Interpolation algorithms calculate the intermediate points between given control points, resulting in a smooth curve that passes through those points.
- Parametric Equations: Curves can be defined using parametric equations, which describe the position of points along the curve as a function of a parameter. Parametric equations allow for precise control over the curve’s shape and allow it to be animated or transformed.
- Tension: Tension affects the curvature and tightness of a curve. It controls the smoothness or sharpness of the curve by adjusting the tension between neighboring control points. Higher tension values create a more tightly curved shape, while lower values result in a looser curve.
- Continuity: Continuity refers to the smoothness and seamless connection between curve segments. Curves can have different levels of continuity, such as C0 (position continuity), C1 (tangent continuity), or C2 (curvature continuity). Higher levels of continuity result in smoother transitions between curve segments.
- Subdivision: Subdivision is a technique used to refine and enhance the quality of curves. It involves dividing the curve into smaller segments and calculating additional points along the curve to create a smoother representation.
- Curve Type: Curves can have various types, such as Bezier curves, B-splines, NURBS (Non-Uniform Rational B-splines), or Catmull-Rom curves. Each curve type has its own mathematical formulation and characteristics, allowing for different degrees of control and versatility.
These curve attributes provide users with control over the shape, smoothness, and behavior of curves in computer graphics. By adjusting these attributes, designers and artists can create complex and aesthetically pleasing curves that meet their specific requirements.
COLOR AND GRAYSCALE LEVELS
Color and grayscale levels refer to the range of colors or shades of gray that can be displayed or represented in an image or graphic. These levels determine the variation and richness of colors or tones that can be perceived by the human eye or captured by imaging devices. Here’s an explanation of color and grayscale levels
Color Levels: Color levels represent the number of distinct colors that can be displayed or represented in an image. The number of color levels determines the depth or bit depth of the color information. Common color levels include:
- Monochrome: Monochrome images have only two color levels, typically black and white. Each pixel in a monochrome image can be either fully black or fully white, representing the absence or presence of light.
- Grayscale: Grayscale images have multiple shades of gray, ranging from pure black to pure white. The number of grayscale levels is typically expressed as a power of two, such as 2, 4, 8, 16, or 256 levels. Higher levels of grayscale provide smoother transitions between shades of gray, resulting in more detailed and nuanced grayscale images.
- True Color: True color images, also known as 24-bit color, offer millions of distinct colors. They are created by combining three primary colors (red, green, and blue) in different intensities. True color images provide a wide range of colors and are commonly used in digital photography, computer graphics, and displays.
Grayscale Levels: Grayscale levels specifically refer to the number of shades of gray that can be represented in an image. Grayscale levels are often used to represent images or graphics where color is not necessary or desired. The higher the number of grayscale levels, the smoother and more detailed the grayscale representation will be. Common grayscale levels include:
- 2-Level Grayscale: A 2-level grayscale image, often referred to as binary, has only two shades of gray, typically black and white. Each pixel is either black or white, without any intermediate shades.
- 8-Level Grayscale: An 8-level grayscale image can represent 8 distinct shades of gray. It offers more tonal variation and smoother transitions between shades compared to binary grayscale.
- 256-Level Grayscale: A 256-level grayscale image is capable of representing 256 shades of gray. This provides a greater level of detail and subtle variations in grayscale images, making them appear more realistic and visually appealing.
Higher grayscale levels result in finer gradations and a more precise representation of subtle details in grayscale images.
The number of color and grayscale levels available affects the overall quality, depth, and realism of digital images. Higher levels provide more fidelity and accuracy in capturing and reproducing colors or grayscale tones, resulting in more visually appealing and lifelike representations.
Soft Fill
Soft fill refers to a filling technique used in computer graphics and design where a region or shape is filled with a smooth and gradual transition of color, creating a soft and blended appearance. Instead of a solid or uniform color, soft fill uses gradients, textures, or other methods to achieve a smooth and visually appealing transition of colors within the filled area. Here’s a further explanation of soft fill:
Gradients: Gradients are commonly used for soft fill effects. A gradient is a smooth transition between two or more colors, allowing for a gradual change in hue, saturation, or brightness across the filled area. Gradients can be linear, radial, or angular, depending on the desired effect. With soft fill gradients, the colors blend seamlessly, creating a smooth and visually pleasing appearance.
Textures: Soft fill can also be achieved by applying textures to the filled area. Textures add patterns or images to the region, providing a non-uniform appearance. These textures can be created from various sources such as photographs, artwork, or procedural algorithms. By using textured soft fill, the region gains depth and complexity, adding visual interest and enhancing the overall design.
Blending Modes: Blending modes are another technique used in soft fill to create smooth transitions between colors. Blending modes determine how the filled color interacts with the existing colors or content beneath it. They can be used to achieve effects like transparency, overlay, multiply, screen, and more. By applying blending modes, the soft fill color blends harmoniously with the underlying elements, resulting in seamless integration.
Transparency and Opacity: Soft fill can incorporate transparency or opacity to achieve a softer appearance. By adjusting the transparency or opacity of the fill color, the underlying elements or colors can shine through, creating a delicate and translucent effect. This technique allows for the blending of colors and the creation of soft, subtle, and ethereal fills.
Soft fill is commonly used in various graphic design applications, illustrations, user interfaces, web design, and digital artwork. It provides a visually pleasing and sophisticated approach to filling regions, adding depth, dimension, and a sense of realism to the overall design.
CHARACTER ATTRIBUTES
Character attributes refer to the properties and characteristics that define the appearance and behavior of individual characters or text in computer applications, word processors, and graphic design software. These attributes allow for customization and control over the style, size, font, color, and other aspects of textual content. Here are some common character attributes:
- Font: The font attribute determines the typeface or style of the characters. Fonts come in various styles, such as serif, sans-serif, script, monospaced, or decorative. Each font has its own unique design, which can significantly impact the overall look and feel of the text.
- Size: Character size refers to the height or point size of the text. It determines how large or small the characters appear on the screen or when printed. The size is typically measured in points, with larger point sizes resulting in larger characters.
- Color: The color attribute determines the hue of the characters. It allows for the selection of a wide range of colors using color models such as RGB, CMYK, or HSL. The color of the characters can be solid or gradient-based, allowing for smooth color transitions within the text.
- Style: Character style includes attributes like bold, italic, underline, strikethrough, or subscript/superscript. These styles can be applied individually or in combination to add emphasis, highlight specific sections, or denote special formatting within the text.
- Alignment: The alignment attribute determines the horizontal positioning of the text within a given space. Common alignment options include left-aligned, right-aligned, centered, or justified. Alignment affects the visual balance and readability of the text.
- Spacing: Spacing attributes control the amount of space between characters, words, and lines of text. These attributes include letter-spacing (tracking), word spacing, and line spacing (leading). Adjusting spacing can enhance readability and improve the overall visual appearance of the text.
- Capitalization: Capitalization attributes determine whether the text is displayed in uppercase, lowercase, or a combination of both (title case). These attributes are used to convey specific meanings or conform to particular stylistic conventions.
- Kerning: Kerning is the adjustment of the space between specific pairs of characters to improve the visual flow and spacing. It ensures that the characters appear visually balanced and harmonious, especially in cases where certain character combinations may require special attention.
- Language and Typography Features: Some character attributes are specific to certain languages or typographic conventions. These include ligatures, special characters, diacritical marks (accents), or language-specific typographic rules, which enhance the readability and correctness of the text.
By adjusting these character attributes, users can customize and control the appearance of text, ensuring it matches the desired style, readability, and visual consistency within a document or design.
BUNDLED ATTRIBUTES
Bundled attributes, in the context of computer graphics or design, refer to a group or combination of various attributes that are applied together to achieve a desired visual effect or style. Instead of modifying individual attributes separately, bundled attributes provide a convenient way to apply a predefined set of characteristics to elements or objects. Here’s an explanation of bundled attributes:
- Presets: Presets are preconfigured sets of attributes that can be easily applied to elements or objects with a single action. These preset may include a combination of color, font, size, style, and other attributes. By selecting a preset, multiple attributes are bundled together and applied simultaneously, saving time and effort in manually adjusting each attribute individually.
- Stylesheets: Stylesheets, commonly used in web development and document processing, are files containing sets of predefined styles that can be applied to different elements or sections of a document. A stylesheet typically includes bundled attributes such as font, color, size, alignment, and spacing. By linking or applying a stylesheet, the bundled attributes are automatically applied to the designated elements throughout the document.
- Themes: Themes are bundled attributes designed to provide a consistent and coordinated visual appearance across an entire application, website, or document. A theme encompasses a comprehensive set of attributes, including color schemes, typography, layout, and graphical elements. By applying a theme, all elements within the project adopt the bundled attributes, creating a unified and cohesive design.
- Templates: Templates are pre-designed layouts or documents that include bundled attributes for various sections and elements. These attributes cover not only the visual aspects but also the structural and functional elements of the design. By using a template, designers, and users can quickly start a project with predefined bundled attributes, ensuring consistency and efficiency.
- Styles and Layers: In graphic design software, styles, and layers allow for bundling attributes that can be applied to objects, shapes, or text layers. These bundled attributes include fill color, stroke color, shadow effects, opacity, and other properties. Applying a style or layer to an object automatically applies the bundled attributes, saving time and providing consistent styling across multiple elements.
Bundled attributes provide convenience and efficiency in applying a set of predefined characteristics to elements or objects in computer graphics and design. They allow for consistent styling, quick customization, and unified appearances, making it easier to achieve desired visual effects and maintain design consistency throughout a project.
INQUIRY FUNCTIONS
In computer programming and software development, inquiry functions, also known as query functions, are functions or methods that retrieve information or data from a system or database. These functions enable users or applications to ask questions or make specific requests for data and receive relevant results. Inquiry functions play a crucial role in retrieving, filtering, and manipulating data. Here are a few examples of inquiry functions:
- Search: The search function allows users to query a system or database using specific criteria to retrieve matching records or information. Users can search for data based on keywords, attributes, or other defined parameters. The search function returns results that meet the specified search criteria.
- Sort: The sort function is used to arrange a collection of data in a specific order. It allows users to specify the sorting criteria, such as ascending or descending order based on a particular attribute or field. The sort function reorders the data accordingly, making it easier to navigate and analyze.
- Filter: The filter function enables users to narrow down a dataset by applying specific conditions or rules. Users can define filters based on attributes, values, or logical expressions. The filter function selectively includes or excludes data that matches the specified conditions, providing a subset of the original dataset.
- Aggregate: The aggregate function performs calculations or operations on a set of data to derive summary information. It can compute metrics such as sum, average, maximum, minimum, count, or other statistical measures. The aggregate function condenses the data into meaningful summaries for analysis or reporting purposes.
- Join: The join function combines data from multiple tables or sources based on a common attribute or key. It allows users to merge related data to create a more comprehensive dataset. Join functions are commonly used in database systems to retrieve data that spans across multiple tables or sources.
- Count: The count function determines the number of occurrences or records that meet specific criteria. It is often used to obtain the total count of records in a dataset or the count of records that satisfy a particular condition. The count function provides a simple yet essential inquiry for data analysis and reporting.
- Aggregation: Aggregation functions compute values based on groups or subsets of data. They allow users to group data based on certain attributes and perform calculations on each group. Common aggregation functions include sum, average, count, minimum, and maximum.
Inquiry functions provide the means to extract relevant data, analyze it, and derive meaningful insights. They are essential for data-driven applications, databases, and information retrieval systems, enabling users to interact with data effectively and retrieve specific information based on their requirements.