Filled-area primitives refer to basic geometric shapes filled with color or texture. These shapes can be used in computer graphics and design to create solid or shaded regions.
Some commonly used filled-area primitives include:
- Rectangle: A four-sided shape with four right angles, where all sides are parallel. It can be filled with a solid color or texture.
- Circle: A perfectly round shape with all points equidistant from the center. It can be filled with a solid color or texture.
- Ellipse: A stretched circle, where the distances from the center to the outer edges vary. It can also be filled with a solid color or texture.
- Polygon: A closed shape with three or more straight sides. Polygons can have various numbers of sides, and each side can be of different lengths. They can be filled with a solid color or texture.
- Triangle: A polygon with three sides. It can be filled with a solid color or texture.
- Quadrilateral: A polygon with four sides. It can be filled with a solid color or texture.
These filled-area primitives serve as the foundation for creating more complex shapes and graphics in various applications, such as computer-aided design (CAD), graphic design, and computer games.
Scan line Polygon Fill Algorithm
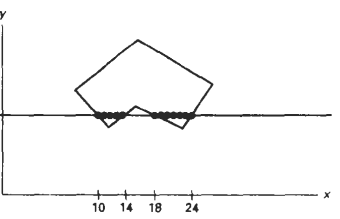
The Scan Line Polygon Fill algorithm is a method used to fill the interior of a polygon with a specified color or texture. It works by dividing the polygon into a series of horizontal scan lines and determining which pixels within each scan line lie inside the polygon.

Here’s a step-by-step explanation of the Scan Line Polygon Fill algorithm:
- Determine the edges of the polygon: Identify the endpoints of each edge of the polygon. These endpoints should be sorted based on their y-coordinates in ascending order.
- Initialize the edge table (ET) and active edge table (AET): The ET stores information about each edge, such as its y-coordinate, the x-coordinate of the starting point, and the inverse slope of the edge (1/m). The AET is initially empty.
- Fill the ET: For each edge in the polygon, calculate its relevant information and add it to the ET.
- Set the current scan line to the minimum y-coordinate of the polygon.
- Process the scan lines: Starting from the current scan line, perform the following steps until reaching the maximum y-coordinate of the polygon:
- a. Update the AET: Remove edges from the AET whose maximum y-coordinate is less than the current scan line.
- b. Add new edges to the AET: Take the edges from the ET whose minimum y-coordinate is equal to the current scan line and add them to the AET.
- c. Sort the AET: Sort the edges in the AET based on their x-coordinates in ascending order.
- d. Fill the pixels between pairs of edges: Traverse the AET, taking pairs of edges at a time, and fill the pixels between their x-coordinates on the current scan line.
- e. Update the x-coordinates of the remaining edges in the AET: Increment the x-coordinate of each edge in the AET by its inverse slope (1/m).
- f. Increment the current scan line.
- Repeat steps 5a to 5f until the current scan line reaches the maximum y-coordinate of the polygon.
By following these steps, the Scan Line Polygon Fill algorithm determines the set of pixels that fall within the polygon’s boundaries and fills them with the desired color or texture. This technique is widely used in computer graphics for rendering and image processing.
Boundary-Fill Algorithm
The Boundary-Fill Algorithm is a method used to fill a closed region with a specified color or pattern. It works by starting from a seed point inside the region and recursively filling adjacent pixels until a boundary color is encountered.
Here’s a step-by-step explanation of the Boundary-Fill Algorithm:
- Choose a seed point: Select a pixel within the closed region as the seed point. This point should be inside the boundary and have a color that indicates the area to be filled.
- Check the current pixel: Examine the color of the current pixel.
- Fill the current pixel: If the color of the current pixel is not the boundary color and not the fill color, change the color of the pixel to the fill color.
- Recursive step: Recursively apply steps 2 and 3 to the neighboring pixels of the current pixel. These neighboring pixels can be the ones directly above, below, to the left, and to the right of the current pixel.
- Termination condition: The recursion continues until the boundary color is encountered, which signifies the boundary of the region being filled. When the algorithm encounters a pixel with the boundary color, it stops and returns.
By following these steps, the Boundary-Fill Algorithm fills the closed region starting from the seed point and expanding outward until it reaches the boundary. The algorithm ensures that the fill color does not spill over to pixels outside the closed region.
It’s important to note that the Boundary-Fill Algorithm is susceptible to stack overflow issues if the recursion depth becomes too large. To mitigate this, an alternative approach called the Flood-Fill Algorithm can be used, which utilizes a stack or queue data structure to avoid excessive recursion.
Flood-Fill Algorithm
The Flood-Fill Algorithm is a method used to fill a closed region with a specified color or pattern. It works by starting from a seed point inside the region and iteratively filling adjacent pixels until a boundary color is encountered.
Here’s a step-by-step explanation of the Flood-Fill Algorithm:
- Choose a seed point: Select a pixel within the closed region as the seed point. This point should be inside the boundary and have a color that indicates the area to be filled.
- Create a stack or queue: Initialize a stack or a queue data structure to keep track of the pixels to be processed.
- Push the seed point: Push the seed point onto the stack or enqueue it in the queue.
- Process the stack/queue: While the stack (for depth-first search) or the queue (for breadth-first search) is not empty, do the following:
- a. Pop/dequeue a pixel from the stack/queue.
- b. Check the current pixel: Examine the color of the current pixel.
- c. Fill the current pixel: If the color of the current pixel is not the boundary color and not the fill color, change the color of the pixel to the fill color.
- d. Check neighboring pixels: Examine the neighboring pixels of the current pixel (e.g., pixels directly above, below, to the left, and to the right).
- e. Add valid neighboring pixels to the stack/queue: If a neighboring pixel has the same color as the seed point and is not already in the stack/queue, push it onto the stack or enqueue it in the queue.
- Repeat step 4 until the stack (for depth-first search) or the queue (for breadth-first search) becomes empty.
By following these steps, the Flood-Fill Algorithm fills the closed region starting from the seed point and expanding outward until it reaches the boundary. The algorithm ensures that the fill color does not spill over to pixels outside the closed region.
Flood-Fill Algorithm can be implemented using either depth-first search (DFS) or breadth-first search (BFS) strategies. DFS typically uses a stack, while BFS uses a queue to process the pixels in the order of their discovery.
The Flood-Fill Algorithm is commonly used in computer graphics, image processing, and interactive applications to fill regions with color, perform selections, and apply various effects.
