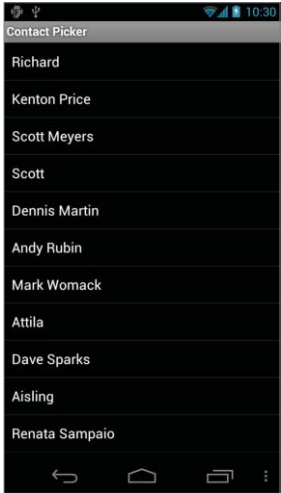
If you’re looking to create Android Contact picker app then here you can see the complete code of Android Contact picker app
Create a new ContactPicker project that includes a ContactPicker Activity:
package com.paad.contactpicker;
import android.app.Activity;
import android.content.Intent;
import android.database.Cursor;
import android.net.Uri;
import android.os.Bundle;
import android.provider.ContactsContract.Contacts;
import android.view.View;
import android.widget.AdapterView;
import android.widget.ListView;
import android.widget.SimpleCursorAdapter;
public class ContactPicker extends Activity {
 @Override
 public void onCreate(Bundle savedInstanceState) {
 super.onCreate(savedInstanceState);
 setContentView(R.layout.main);
 }
}
Modify the main.xml layout resource to include a single ListView control. This control will be used to display the contacts
<?xml version=”1.0” encoding=”utf-8”?>
<LinearLayout xmlns:android=”http://schemas.android.com/apk/res/android”
 android:orientation=”vertical”
 android:layout_width=”match_parent”
 android:layout_height=”match_parent”>
 <ListView android:id=”@+id/contactListView”
 android:layout_width=”match_parent”
 android:layout_height=”wrap_content”
 />
</LinearLayout>
Create a new listitemlayout.xml layout resource that includes a single TextView control. This control will be used to display each contact in the List View.
<?xml version=”1.0” encoding=”utf-8”?>
<LinearLayout xmlns:android=”http://schemas.android.com/apk/res/android”
 android:orientation=”vertical”
 android:layout_width=”match_parent”
 android:layout_height=”match_parent”
 >
 <TextView
 android:id=”@+id/itemTextView”
 android:layout_width=”match_parent”
 android:layout_height=”wrap_content”
 android:padding=”10dp”
 android:textSize=”16dp”
 android:textColor=”#FFF”
 />
</LinearLayout>
Return to the ContactPicker Activity. Override the onCreate method.
@Override
public void onCreate(Bundle savedInstanceState) {
 super.onCreate(savedInstanceState);
 setContentView(R.layout.main);
}
Create a new Cursor to retrieve the people stored in the contact list, and bind it to the List View using a SimpleCursorArrayAdapter.
final Cursor c = getContentResolver().query(
 ContactsContract.Contacts.CONTENT_URI, null, null, null, null);
 String[] from = new String[] { Contacts.DISPLAY_NAME_PRIMARY };
 int[] to = new int[] { R.id.itemTextView };
 SimpleCursorAdapter adapter = new SimpleCursorAdapter(this,
 R.layout.listitemlayout,
 c,
 from,
 to);
 ListView lv = (ListView)findViewById(R.id.contactListView);
 lv.setAdapter(adapter);
Add an onItemClickListener to the List View. Selecting a contact from the list should return a path to the item to the calling Activity
lv.setOnItemClickListener(new ListView.OnItemClickListener() {
 public void onItemClick(AdapterView<?> parent, View view, int pos,
 long id) {
 // Move the cursor to the selected item
 c.moveToPosition(pos);
 // Extract the row id.
 int rowId = c.getInt(c.getColumnIndexOrThrow(“_id”));
 // Construct the result URI.
 Uri outURI =
 ContentUris.withAppendedId(ContactsContract.Contacts.CONTENT_URI, rowId);
 Intent outData = new Intent();
 outData.setData(outURI);
 setResult(Activity.RESULT_OK, outData);
 finish();
 }
 });
Modify the application manifest and replace the intent-filter tag of the Activity to add support for the ACTION_PICK action on contact data:
<?xml version=”1.0” encoding=”utf-8”?>
<manifest xmlns:android=”http://schemas.android.com/apk/res/android”
 package=”com.paad.contactpicker”>
<application android:icon=”@drawable/ic_launcher”>
 <activity android:name=”.ContactPicker” android:label=”@string/app_name”>
 <intent-filter>
 <action android:name=”android.intent.action.PICK”></action>
 <category android:name=”android.intent.category.DEFAULT”></category>
 <data android:path=”contacts” android:scheme=”content”></data>
 </intent-filter>
 </activity>
 </application>
</manifest>
This completes the sub-Activity. To test it, create a new test harness ContactPickerTester Activity. Create a new layout resource — contactpickertester.xml — that includes a TextView to display the selected contact and a Button to start the sub-Activity:
<?xml version=”1.0” encoding=”utf-8”?>
<LinearLayout xmlns:android=”http://schemas.android.com/apk/res/android”
 android:orientation=”vertical”
 android:layout_width=”match_parent”
 android:layout_height=”match_parent”
 >
 <TextView
 android:id=”@+id/selected_contact_textview”
 android:layout_width=”match_parent”
 android:layout_height=”wrap_content”
 />
 <Button
 android:id=”@+id/pick_contact_button”
 android:layout_width=”match_parent”
 android:layout_height=”wrap_content”
 android:text=”Pick Contact”
 />
</LinearLayout>
Override the onCreate method of the ContactPickerTester to add a click listener to the Button so that it implicitly starts a new sub-Activity by specifying the ACTION_PICK and the contact database URI (content://contacts/):
package com.paad.contactpicker;
import android.app.Activity;
import android.content.Intent;
import android.database.Cursor;
import android.net.Uri;
import android.os.Bundle;
import android.provider.ContactsContract;
import android.view.View;
import android.view.View.OnClickListener;
import android.widget.Button;
import android.widget.TextView;
public class ContactPickerTester extends Activity {
 public static final int PICK_CONTACT = 1;
@Override
 public void onCreate(Bundle savedInstanceState) {
 super.onCreate(savedInstanceState);
 setContentView(R.layout.contactpickertester);
 Button button = (Button)findViewById(R.id.pick_contact_button);
 button.setOnClickListener(new OnClickListener() {
 @Override
 public void onClick(View _view) {
 Intent intent = new Intent(Intent.ACTION_PICK,
 Uri.parse(“content://contacts/”));
 startActivityForResult(intent, PICK_CONTACT);
 }
 });
 }
}
When the sub-Activity returns, use the result to populate the Text View with the selected contact’s name:
@Override
public void onActivityResult(int reqCode, int resCode, Intent data) {
 super.onActivityResult(reqCode, resCode, data);
 switch(reqCode) {
 case (PICK_CONTACT) : {
 if (resCode == Activity.RESULT_OK) {
 Uri contactData = data.getData();
 Cursor c = getContentResolver().query(contactData, null, null, null, null);
 c.moveToFirst();
 String name = c.getString(c.getColumnIndexOrThrow(
 ContactsContract.Contacts.DISPLAY_NAME_PRIMARY));
 c.close();
 TextView tv = (TextView)findViewById(R.id.selected_contact_textview);
 tv.setText(name);
 }
 break;
 }
 default: break;
 }
}
With your test harness complete, simply add it to your application manifest. You’ll also need to add a READ_CONTACTS permission within a uses-permission tag to allow the application to access the contacts database.
<?xml version=”1.0” encoding=”utf-8”?>
<manifest xmlns:android=”http://schemas.android.com/apk/res/android”
 package=“com.paad.contactpicker“>
 <uses-permission android:name=”android.permission.READ_CONTACTS”/>
 <application android:icon=”@drawable/ic_launcher”>
 <activity android:name=”.ContactPicker” android:label=”@string/app_name”>
 <intent-filter>
<action android:name=”android.intent.action.PICK”></action>
 <category android:name=”android.intent.category.DEFAULT”></category>
 <data android:path=”contacts” android:scheme=”content”></data>
 </intent-filter>
 </activity>
 <activity android:name=”.ContactPickerTester”
 android:label=”Contact Picker Test”>
 <intent-filter>
 <action android:name=”android.intent.action.MAIN” />
 <category android:name=”android.intent.category.LAUNCHER” />
 </intent-filter>
 </activity>
 </application>
</manifest>